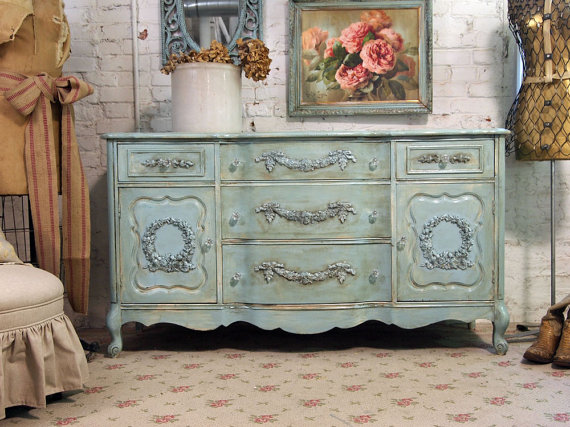
The shabby chic phenomenon has been with us for a while now. And, it’s likely to be with us for a lot longer, too. It’s no coincidence that the trend for old furniture has come about at the same time as rapid improvements of home technology. Perhaps there’s something in our collective subconscious that is resisting the change – who knows?
So, for now, it’s a look that many households in the country are looking at. And, it’s easy to achieve yourself, whatever your budget. Today, we’re going to take a look at how to create that shabby chic look, so roll up your sleeves, get a pen and paper ready, and prepare to go shopping.
Get your tools
You will need a few tools and some paint to get started. First of all, make sure you have some sandpaper on hand, of varying roughness. You’ll also need some metal wool, and some petroleum jelly and wax sealant. Regarding paint, it’s up to you. But, if you want the classic shabby chic look we would recommend you go for a chalk based paint. It leaves a lovely finish that replicates ageing, and it will make your new project look even more authentic.
Buy your furniture
The next step is to buy some furniture from a local dealer, a second-hand outlet, or charity shop. We would advise going as inexpensive as possible when you are just starting out, to allow for any mistakes. It doesn’t matter about the quality of the furniture when you are starting out. Once you are comfortable with how to distress your pieces, you can look at buying antiques and trying it out on them, too.
Sanding
Of course, the idea of shabby chic is to make your furniture appear a little beaten up, old, and distressed. There are plenty of shops out there that sell items such as this – but they will cost you an arm and a leg. Instead, just spend some elbow grease and do it yourself. First of all, get sanding. You have to take off the varnish or paint on your furniture, so the new paint job can attach itself to the wood. If you are using furniture with a veneer, use a fine sandpaper, and make sure you don’t go too deep.
Painting
Once your sanding is complete, you can brush off all the debris and start painting. An undercoat is advised, but it isn’t essential. In fact, no undercoat could help give your furniture that extra bit of shabbiness! A couple of coats of chalk paint – or whatever you have chosen – is all that’s needed. Once you have finished, let the paint dry.
The big finish
You have a couple of options here. You could use some wire wool to scrape away at some of the paint. Don’t overdo it, though, as you only want to distress the finish, rather than wreck it. Petroleum jelly – like Vaseline – is also handy, Just spread it on the areas you want to distress and wipe it off after a few minutes. It will leave some nice impressions. Then it’s just a case of sealing your work with some wax and letting it dry out.
And that’s all there is to it – shabby chic furniture that looks old and expensive, but is a more sustainable way of decorating your home. All it takes is some hard work and a little creativity!


